Here is a list of equipment that I used for the eclipse:
- Celestron G5 Schmidt-Cassegrain telescope (5" aperture, 1250 mm focal length, f/10, on clock driven equatorial mount) with Roger Tuthill Solar Skreen® Filter, 25 mm eyepiece (50x magnification)
- Canon EOS Rebel G 35 mm camera connected to the telescope with T-ring/T-adapter
- Laptop PC (Pentium processor) running Windows 95 and custom "eclipse camera" software
- Custom hardware (uses serial port signals from PC to trip camera cable release)
- Pentax 35 mm automatic camera, 38-105 mm built-in zoom lens
- Sony 8 mm camcorder
- 10x50 Orion Scenix Binoculars with tripod and Thousand Oaks Type 2+ Solar Filters
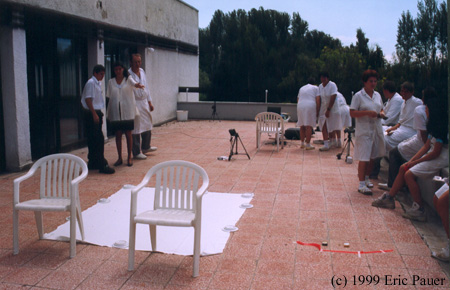
- White sheet for observing shadow bands
- Data loggers from Onset Computer Corporation: StowAway® Light Intensity logger, two HOBO® Light Intensity loggers, HOBO® H8 Pro Relative Humidity/Temperature Logger
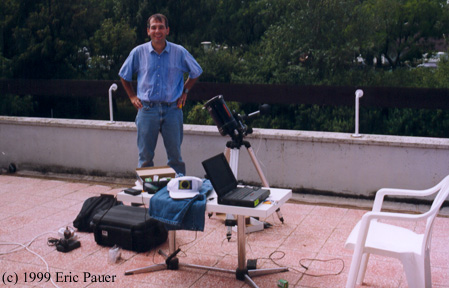
My first order of business was to get my telescope
set up and polar aligned so it could track the sun/moon. First, I
assembled the equatorial mount and then attached the optical tube.
Now to attempt polar alignment at a foreign site in the daytime.
I had never tried daytime polar alignment before (yes, I know I should
have done this before E-day). However, I had sought advice, done
my homework, and was prepared. I had obtained the coordinates of
the hotel from one of our group leaders, Bernie Volz. Bernie had
visited this site about a year before the eclipse and had measured the
latitude and longitude of the Marina Hotel using his Global Position System
(GPS) unit: 46° 56.9' north, 17° 52.8' east. Using
this information, I used the National
Geophysical Data Center Geomagnetic Field Synthesis Program site to
find that the magnetic declination from true north was about 2.5 degrees
east. One of the group members had a high quality marine compass
and bubble angle level, which he lent me after completing his alignment.
I leveled my telescope, then using the angle bubble set my scope elevation
to about 47 degrees (corresponding to the latitude). Then I adjusted
the azimuth to true north using the compass and local declination.
After putting on the Roger Tuthill
Solar Skreen® solar filter, I located the sun and checked out the alignment.
Each time I engaged the clock drive, the drifting of the sun out of the
field of view accelerated. After some frustration and a bit of asking
myself why did you wait until E-day to try alignment, I checked the clock
drive controller and found that the north/south switch was set for the
southern hemisphere! The switch must have been moved inadvertently
in transit. After selecting the northern hemisphere setting, I made
one small azimuth correction and the tracking was perfect (at least through
my 50x view). I found the drift
method of polar alignment page to be helpful in fine tuning the alignment.
I could see a nice set of sunspots on the cool blue disk of the sun (the
Solar Skreen® filter gives a white-blue image). No more fiddling
with this!
I had brought two 35 mm cameras to this eclipse.
About twenty minutes before totality, I removed the star diagonal and eyepiece
from my telescope and connected the Canon
EOS Rebel G 35 mm camera/T-ring/T-adapter to the back of the telescope,
for a prime focus set up. Thus, I was effectively utilizing the 5"
Schmidt-Cassegrain telescope as a 1250 mm f/10 telephoto lens. I
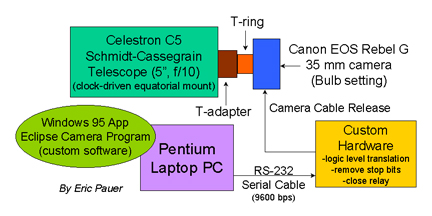
wrote a Microsoft Windows 95 application/utility which I have called the
Eclipse Camera program. The program ran on my laptop PC and interfaced
with some hardware I designed to control my camera take my eclipse pictures
for me automatically. A block diagram of my set up is given below.
I had decided on the exposures I wanted to take well ahead of time, and
placed this information in a data file. The utility program read
the data file containing a chronological list of exposure times (to the
nearest second) along with shutter speeds. For each exposure, the
program generated a signal/pulse of the proper duration (corresponding
to the shutter speed) out the serial port (set for 9600 bits/second).
The Rebel G camera was set to the "Bulb" setting with automatic film advance.
I designed and built a simple logic circuit to translate the signal levels,
remove the stop bits, and close a relay, which triggered the shutter of
the camera for the proper length of time under the Bulb setting.
The only drawback was that the fastest shutter speed I could achieve was
about 1/60 second. With any speeds faster than 1/60 second, the hysteresis
of the camera's electronics controlling the shutter causes the short pulse
to be ignored. I spaced the exposures, which ranged from 1/60 second
to 4 seconds, over the duration of totality. All exposures were a
minimum of 3 seconds apart (i.e. end of one exposure to start of the next
one) to allow for the vibration caused by the film advance motor to die
out. The clock driven equatorial mount kept the sun/moon in the field of
view. I used a 36 exposure roll of Fuji
Superia Reala ISO 100 speed color print film. In short, the whole
set up was completely automatic. All I had to do was remove the solar
filter about a minute before totality.